
Appearance
Mark shots and create them from an edit
An animatic or a layout edit already says where each shot starts and ends. In the video editor you mark those cuts on the timeline, and Create shots turns them into items of a space: one item per shot, with its stages, its frame range and its piece of the edit published as revision 1 of a stage.
Mark the cuts
There are three kinds of marker. Each sits on one frame of the timeline, in the bar above the lanes.
| Marker | Add it with | What it does |
|---|---|---|
| Shot | Shot in the toolbar, or M | Starts a shot, which runs until the next marker. |
| Collection | Collection, or Shift + M | Starts a collection and its first shot. Every shot after it, until the next collection marker, goes in that collection. |
| Comment | Add comment in the right-click menu of a clip | Leaves a note on one frame. It never starts a shot. |
- Move the playhead to the first frame of a shot. , and . step one frame, and Shift + ← and Shift + → jump between markers.
- Press M. A new marker on a frame that already has one just selects it.
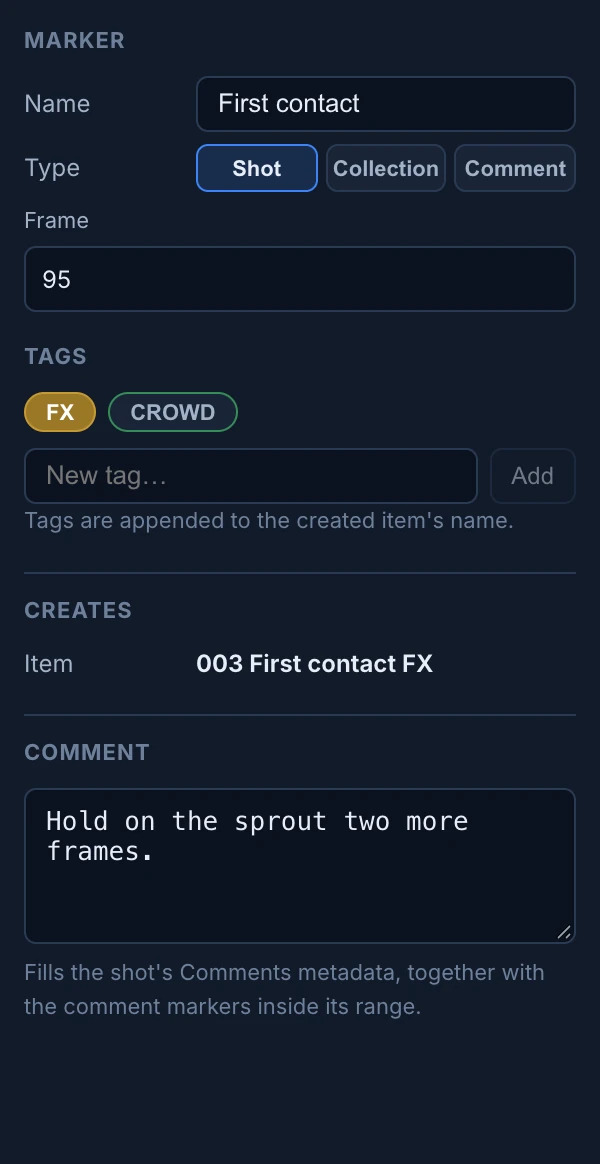
- With the marker selected, name it in the properties panel. Type turns it into another kind of marker, and Frame moves it to an exact frame.
Click a marker to select it and move the playhead to it. Drag a selected marker to move it, double-click it to rename it, and right-click it for Rename and Delete. The toolbar counts the markers of the project.

Tags and notes
A marker's properties also have:
- Tags: short words added after the shot's name, such as "FX" or "CROWD". Type one in New tag… and press Add, or click a tag the project already has. A tag used on several markers can be renamed for all of them with a double-click, and dragging tags sets the order they take in names. Tags that start with the same three letters share a color.
- Comment: a note for the shot, such as "Hold on the sprout two more frames". It goes into the Comments of the created item.
- Creates: the exact collection and item names the marker will create, or why it creates none (it sits past the end of the edit, or on another marker's frame).
A comment marker or a shot's note shows over the preview when the playhead stands on its frame, with who wrote it and when. Type in it to change it, or press the cross to delete it.
Markers from Blender
If the shots were timed in Blender, right-click the clip of that stage and choose Get markers from blend. The Desktop Helper downloads the clip's .blend file and adds its timeline markers to the edit. Without the Helper, or when the revision has no .blend, choose the file on your computer in Import Blender markers: it is read in the browser and stays on your computer.
Create the shots
- Press Create shots in the toolbar. It is greyed out until the project has a marker.
- Destination: pick the Project and the Space the shots go into.
- Stages: tick the stages each shot gets, and pick the Video stage, the one that receives the cut of each shot as its revision 1.
- Metadata: tick what each new item gets from the edit:
- Frame range: the frames of the shot on this timeline, so frame 1 of the edit is frame 1 in Blender.
- FPS of the project.
- Resolution of the project, off by default.
- Comments: the shot's note and every comment marker inside its range, each with its frame, such as "F212: Hold on the sprout".
- Shots: check the names, grouped by collection, and change any of them.
- Pipeline: the inputs the shots are created with. Changes here go into each new shot's own pipeline and leave the space's as it is. See Connect stages: inputs and masters.
- Press Create 6 shots.
The editor saves first. Then each shot shows its progress: Queued, Rendering, Published, or Failed. The cut is rendered on the Animanager server, so you can close the dialog, and the new items appear in the Tree straight away.
How shots are named
Collections and shots are numbered 001, 002, and so on, with the name you gave the marker after the number. Shot numbers start again at 001 in each collection, and tags come after the name:
- A collection marker "Arrival" followed by two shot markers "Wide" and "Close" with the tag "FX" create the collection 001 Arrival with the items 001 Wide and 002 Close FX.
- Shots before the first collection marker go into a collection named Default.
A collection that already exists in the space is reused.