
Appearance
Set up stages and workflows
Stages are the steps of your production, such as Layout, Animation or Lighting. Statuses say where each stage of an item stands. You define both once for the whole studio, group stages into workflows for each kind of work, and every space picks the stages it uses.
Workflows & pipeline
Stages, workflows and statuses live in Settings → Studio → Workflows & pipeline. The Pipeline button in the header opens it directly. It has three tabs:
- Workflows & stages: the studio's stages and the workflows built from them.
- Statuses: the studio's statuses and their presets.
- Stage options: what a revision of each stage must include.
Workflows & stages needs the studio permission Studio settings or Pipeline. Statuses and Stage options need Studio settings. With only Pipeline, the page shows the workflows and stages without the tabs.
Nothing is saved while you edit. Press Save changes in the bar at the bottom of Settings, or Ctrl/⌘ + S, or Discard to drop the changes. The bar collects the changes of every Settings section you opened, and Discard drops them all.
- Reloading or closing the browser tab with unsaved changes asks first.
- Changing Settings for with unsaved changes asks too: Discard and switch or Keep editing.
- The × that closes Settings doesn't ask: save first.
Build a workflow
A workflow is an ordered set of stages for one kind of work, for example Shots or Characters. All workflows take their stages from one shared list, so a stage such as Animation is the same stage in every workflow that uses it.
- Open the Workflows & stages tab.
- Under Workflow presets, click a workflow, or type a name in New workflow preset and press Create.
- Under All stages, click a stage in Available stages to add it to the workflow.
- Drag the stages in the workflow to set their order. × takes a stage out of the workflow.
- To add a stage the studio doesn't have yet, type it in New stage name, pick its color and press Add stage.
- Press Save changes.
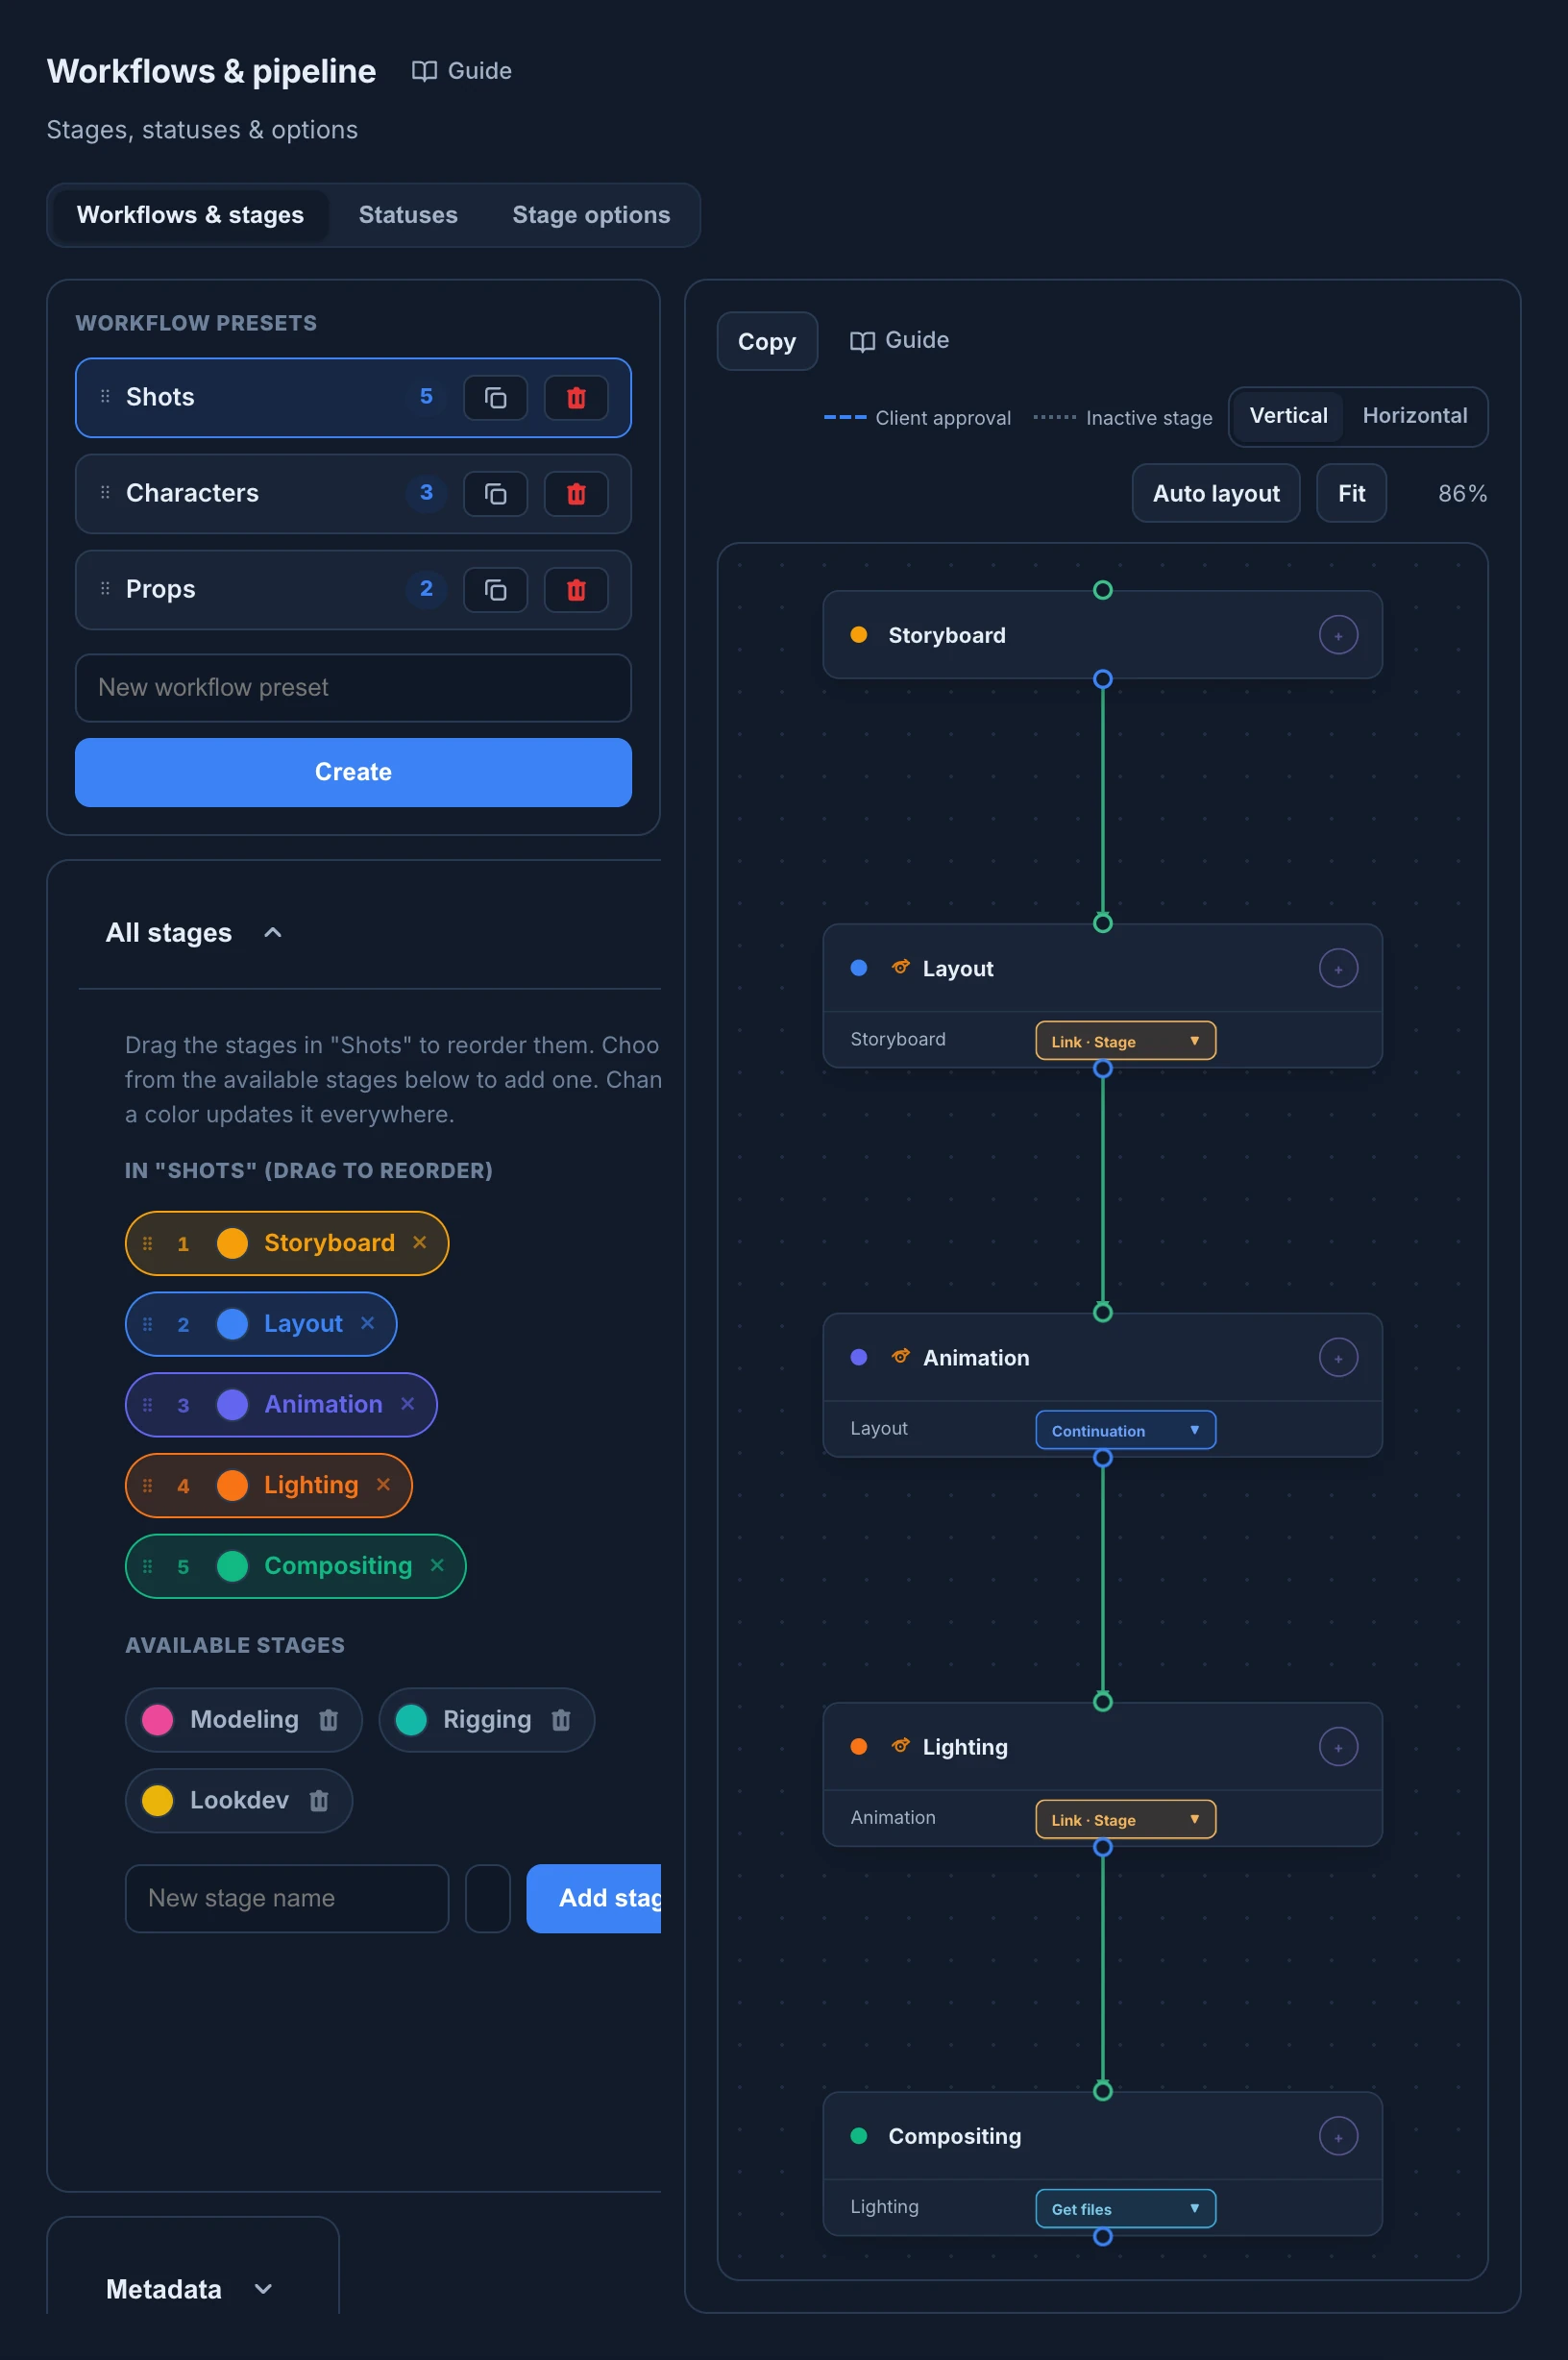
- The color swatch of a stage changes its color everywhere. A stage's name can't be changed here, only its color.
- A new stage goes to Available stages: click it there to add it to the workflow. Its name can't repeat one the studio has, in any case: reuse that stage instead.
- Double-click a workflow's name to rename it (Enter to keep, Esc to cancel), and drag workflows to reorder them. That order is the one of every workflow menu. The duplicate button next to a workflow copies it with its stages and pipeline, as
Name (copy), without its metadata. - The trash button of a workflow deletes it, after you confirm. Its stages stay in the shared list. Spaces that used it keep their stages and pipeline, and show Custom.
- The trash button of an available stage deletes the stage from the studio and from every workflow. A stage that items or spaces still use can't be deleted: the button works, but Save changes then fails with, for example, Cannot delete stage: 4 spaces are using it. Take the stage out of those spaces first.
- On the right, the pipeline of the workflow says how its stages pass work to each other. See Pipeline. Paste there replaces the workflow's stages and pipeline with a copied one, after you confirm.
- Metadata, under the stages, holds values the workflow's stages can use, such as the frame range or the resolution. See Pipeline metadata.
Changing a workflow doesn't change the spaces that already use it: each space keeps its own copy. To bring a space up to date, choose the workflow again in the space's settings.
Set the statuses
The Statuses tab works the same way. All statuses is the studio's list of statuses, and Status presets are named, ordered sets of them.
- Open the Statuses tab.
- Click a preset under Status presets, or type a name in New status preset and press Create.
- Click an available status to add it to the preset, drag the statuses to order them, and use × to take one out.
- To add a status, type it in New status name, pick its color and press Add status.
- Press Save changes.
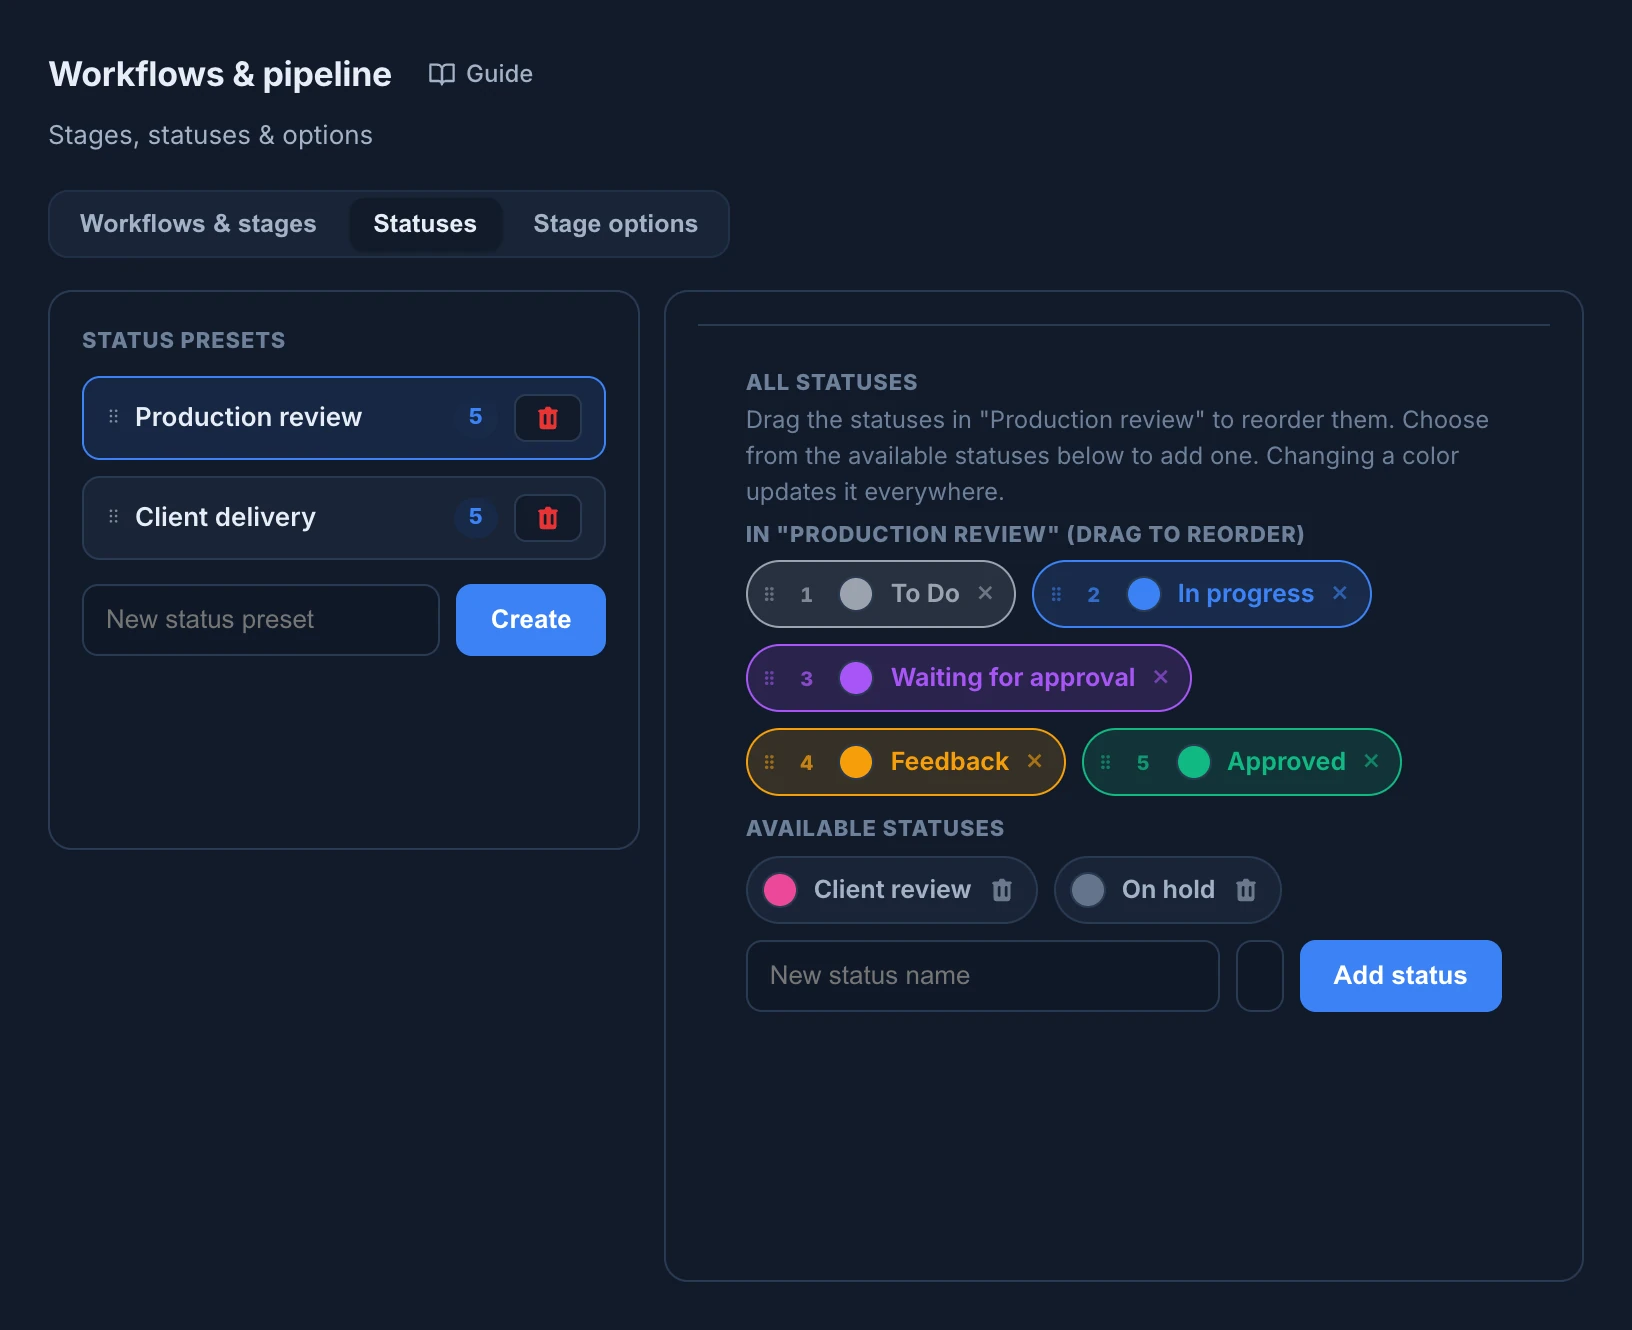
Every studio keeps three built-in statuses: one for work to do, one for feedback and one for finished work. They have no delete button. A status that stages or spaces still use can't be deleted either: as with stages, Save changes says how many use it. Every new space gets all the studio's statuses, so a status that was ever available is usually in use.
A status's name can't be changed here, only its color. Status presets only order the list in Settings: the status menus of the chat, the Grid and the Timeline always offer every status of the studio.
What each built-in status and each scheduling state means to the Timeline, the Grid and Replan is in Statuses and stage types.
Keep status names short and distinct. A status should say where the work stands, not who does it or how urgent it is: that is what assignments and priority are for.
Stage options
Stage options sets, for each stage of the studio, what a revision of that stage must include. It applies everywhere the stage is used.
- Working file types: the kinds of working file the stage accepts, such as Blender, Photoshop or DaVinci Resolve. All file types accepts any.
- Revision requirements: switch on Working file, Media or Description. A revision of the stage can't be sent until it has them.
Use Search stages to find a stage, and press Save changes when you are done.
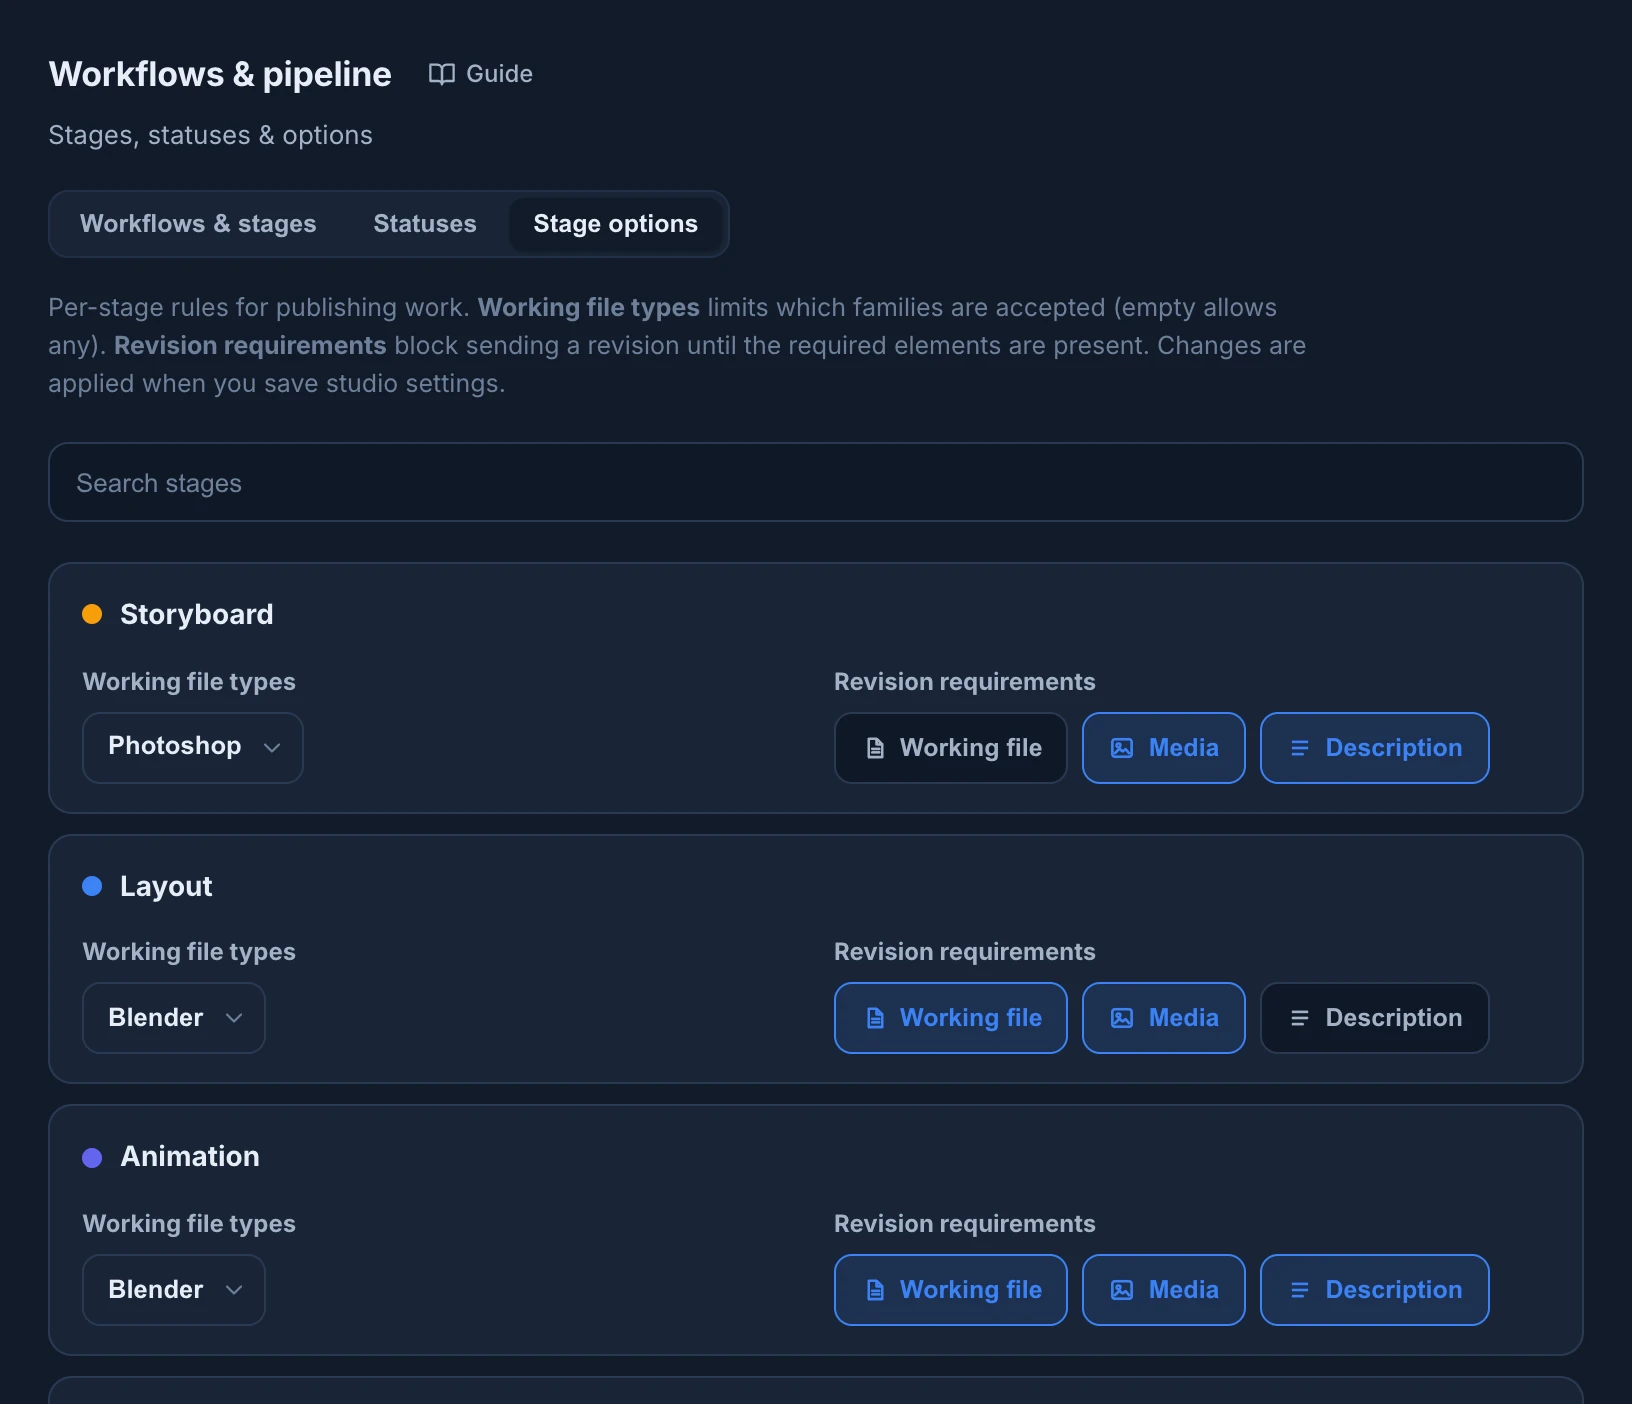
Only require what the studio really needs: every requirement is one more thing to add to each revision. See Revisions for how people publish.
Choose the stages of a space
Each space picks the stages it uses, and their order. They are the columns of its Grid.
- Right-click the space in the Tree and choose Settings. The Settings page opens on Project → Pipeline, with the space in Settings for.
- Under Stages, pick a workflow in the list next to the stage count. The space gets its stages, their order and its pipeline.
- Click a stage to switch it on or off, and drag the stages to change their order. Other stages lists the ones the space doesn't use. All and None switch them all.
- Press Save changes.
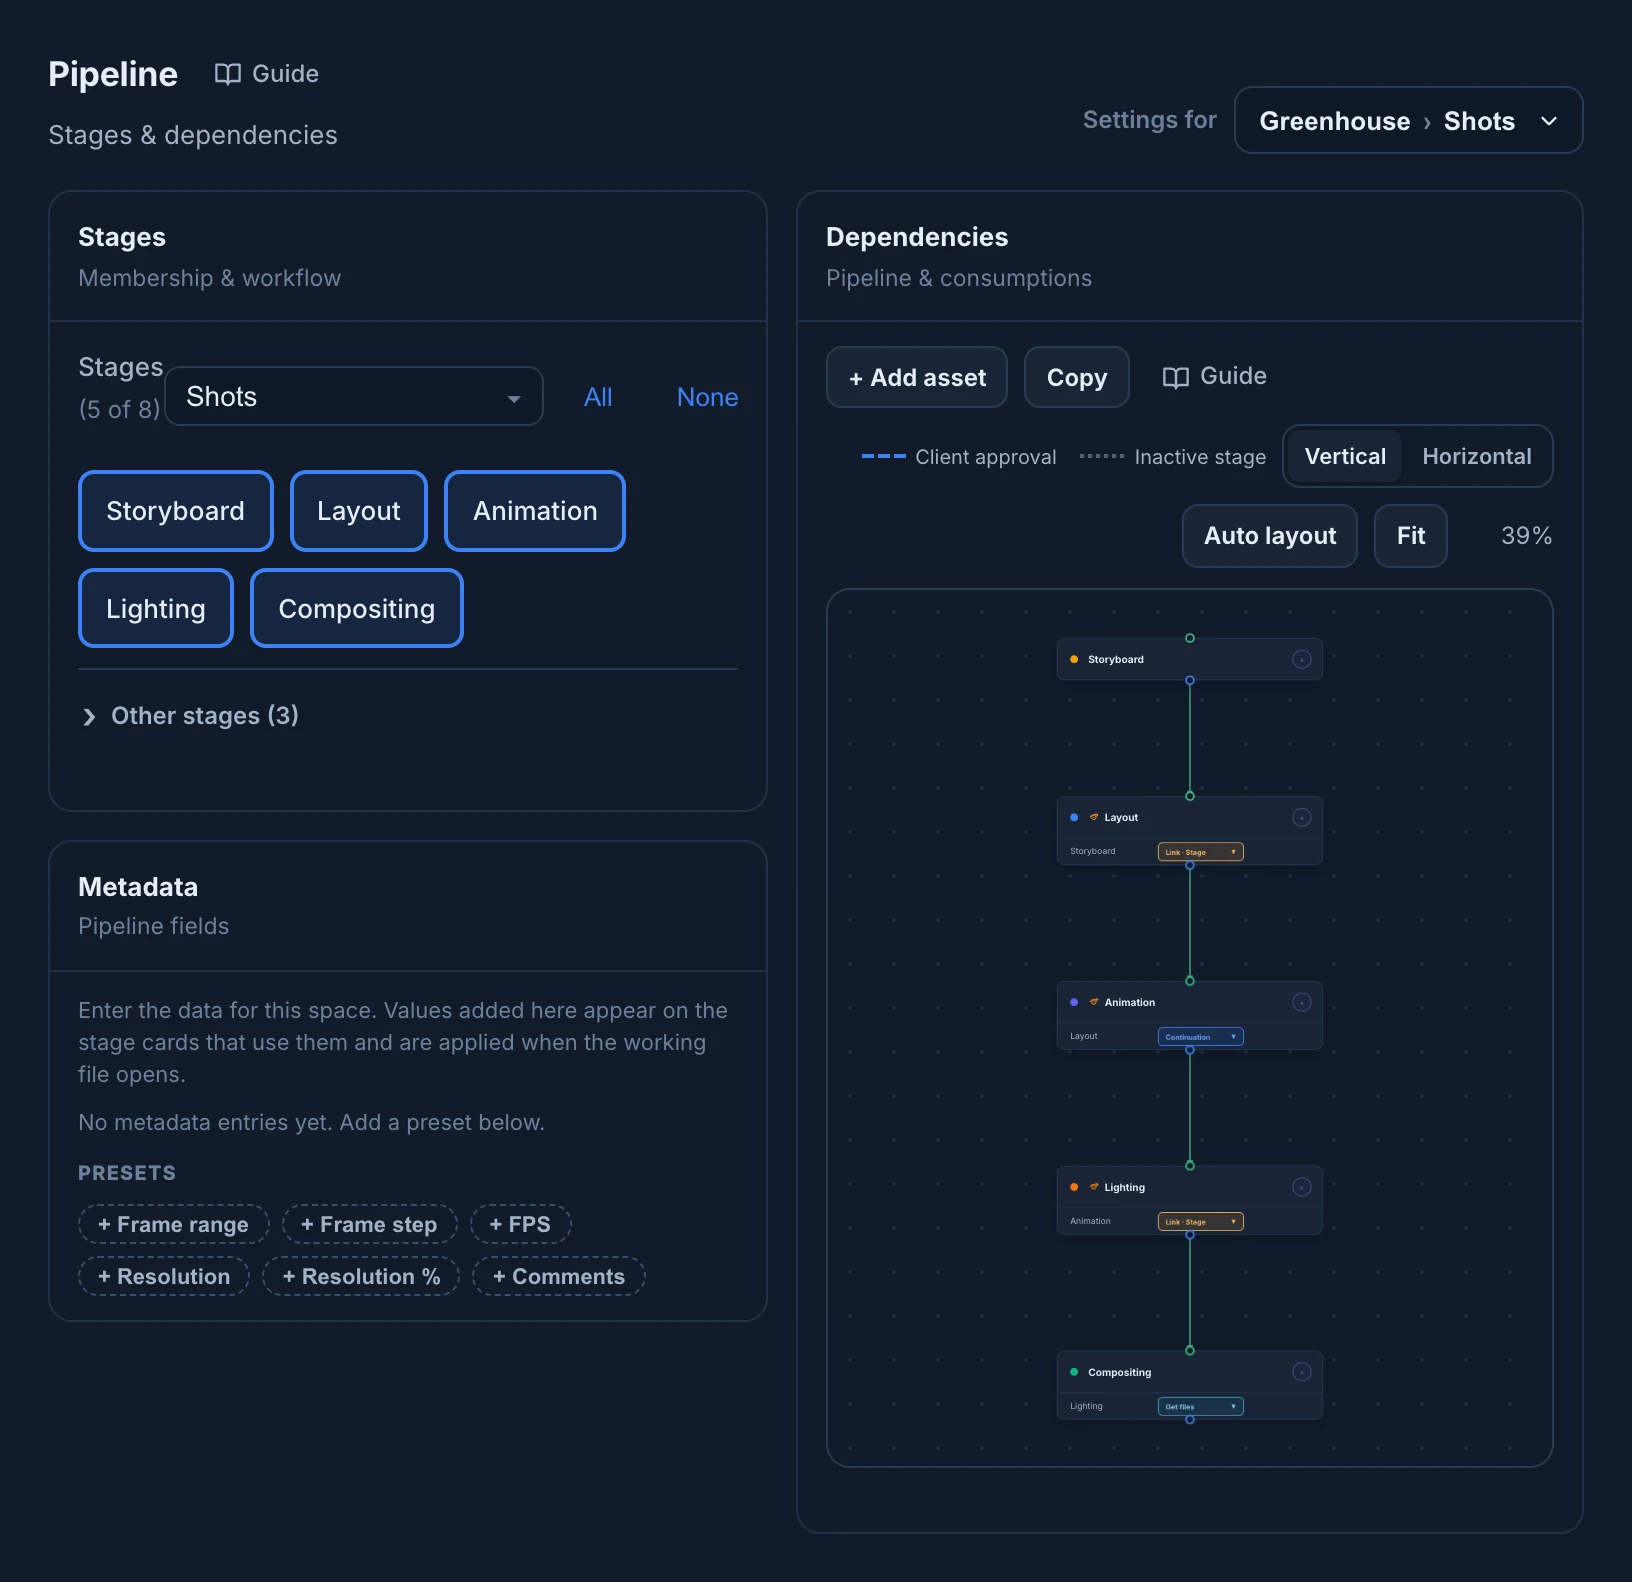
The space keeps its own copy of the workflow. The list shows the workflow's name, with (modified) once the space's stages or pipeline differ from it, or Custom when the space didn't start from a workflow. A new space chooses its stages the same way, in the Stages step of New Space.
Changing a space's stages needs the permission to edit spaces in the project. Without it the section says You can see these settings but not change them.
Collections and items
- A collection shows its space's stages. To show other columns when the Grid is grouped by collection, right-click the collection and choose Settings (or click its gear in the Grid), then set its Active stages. They list every stage of the studio, and any change, even one that matches the space, gives the collection its own list. Use inherited goes back to the space's stages. These are only the columns of the grouped Grid: the space keeps its stages.
- An item has its own set of stages. Right-click it and choose Configure Item (or click its gear in the Grid), then open Stages. With several items selected, Configure Item replaces the stages of all of them at once. See Configure items and recurring work.