
Appearance
Generate images on the canvas
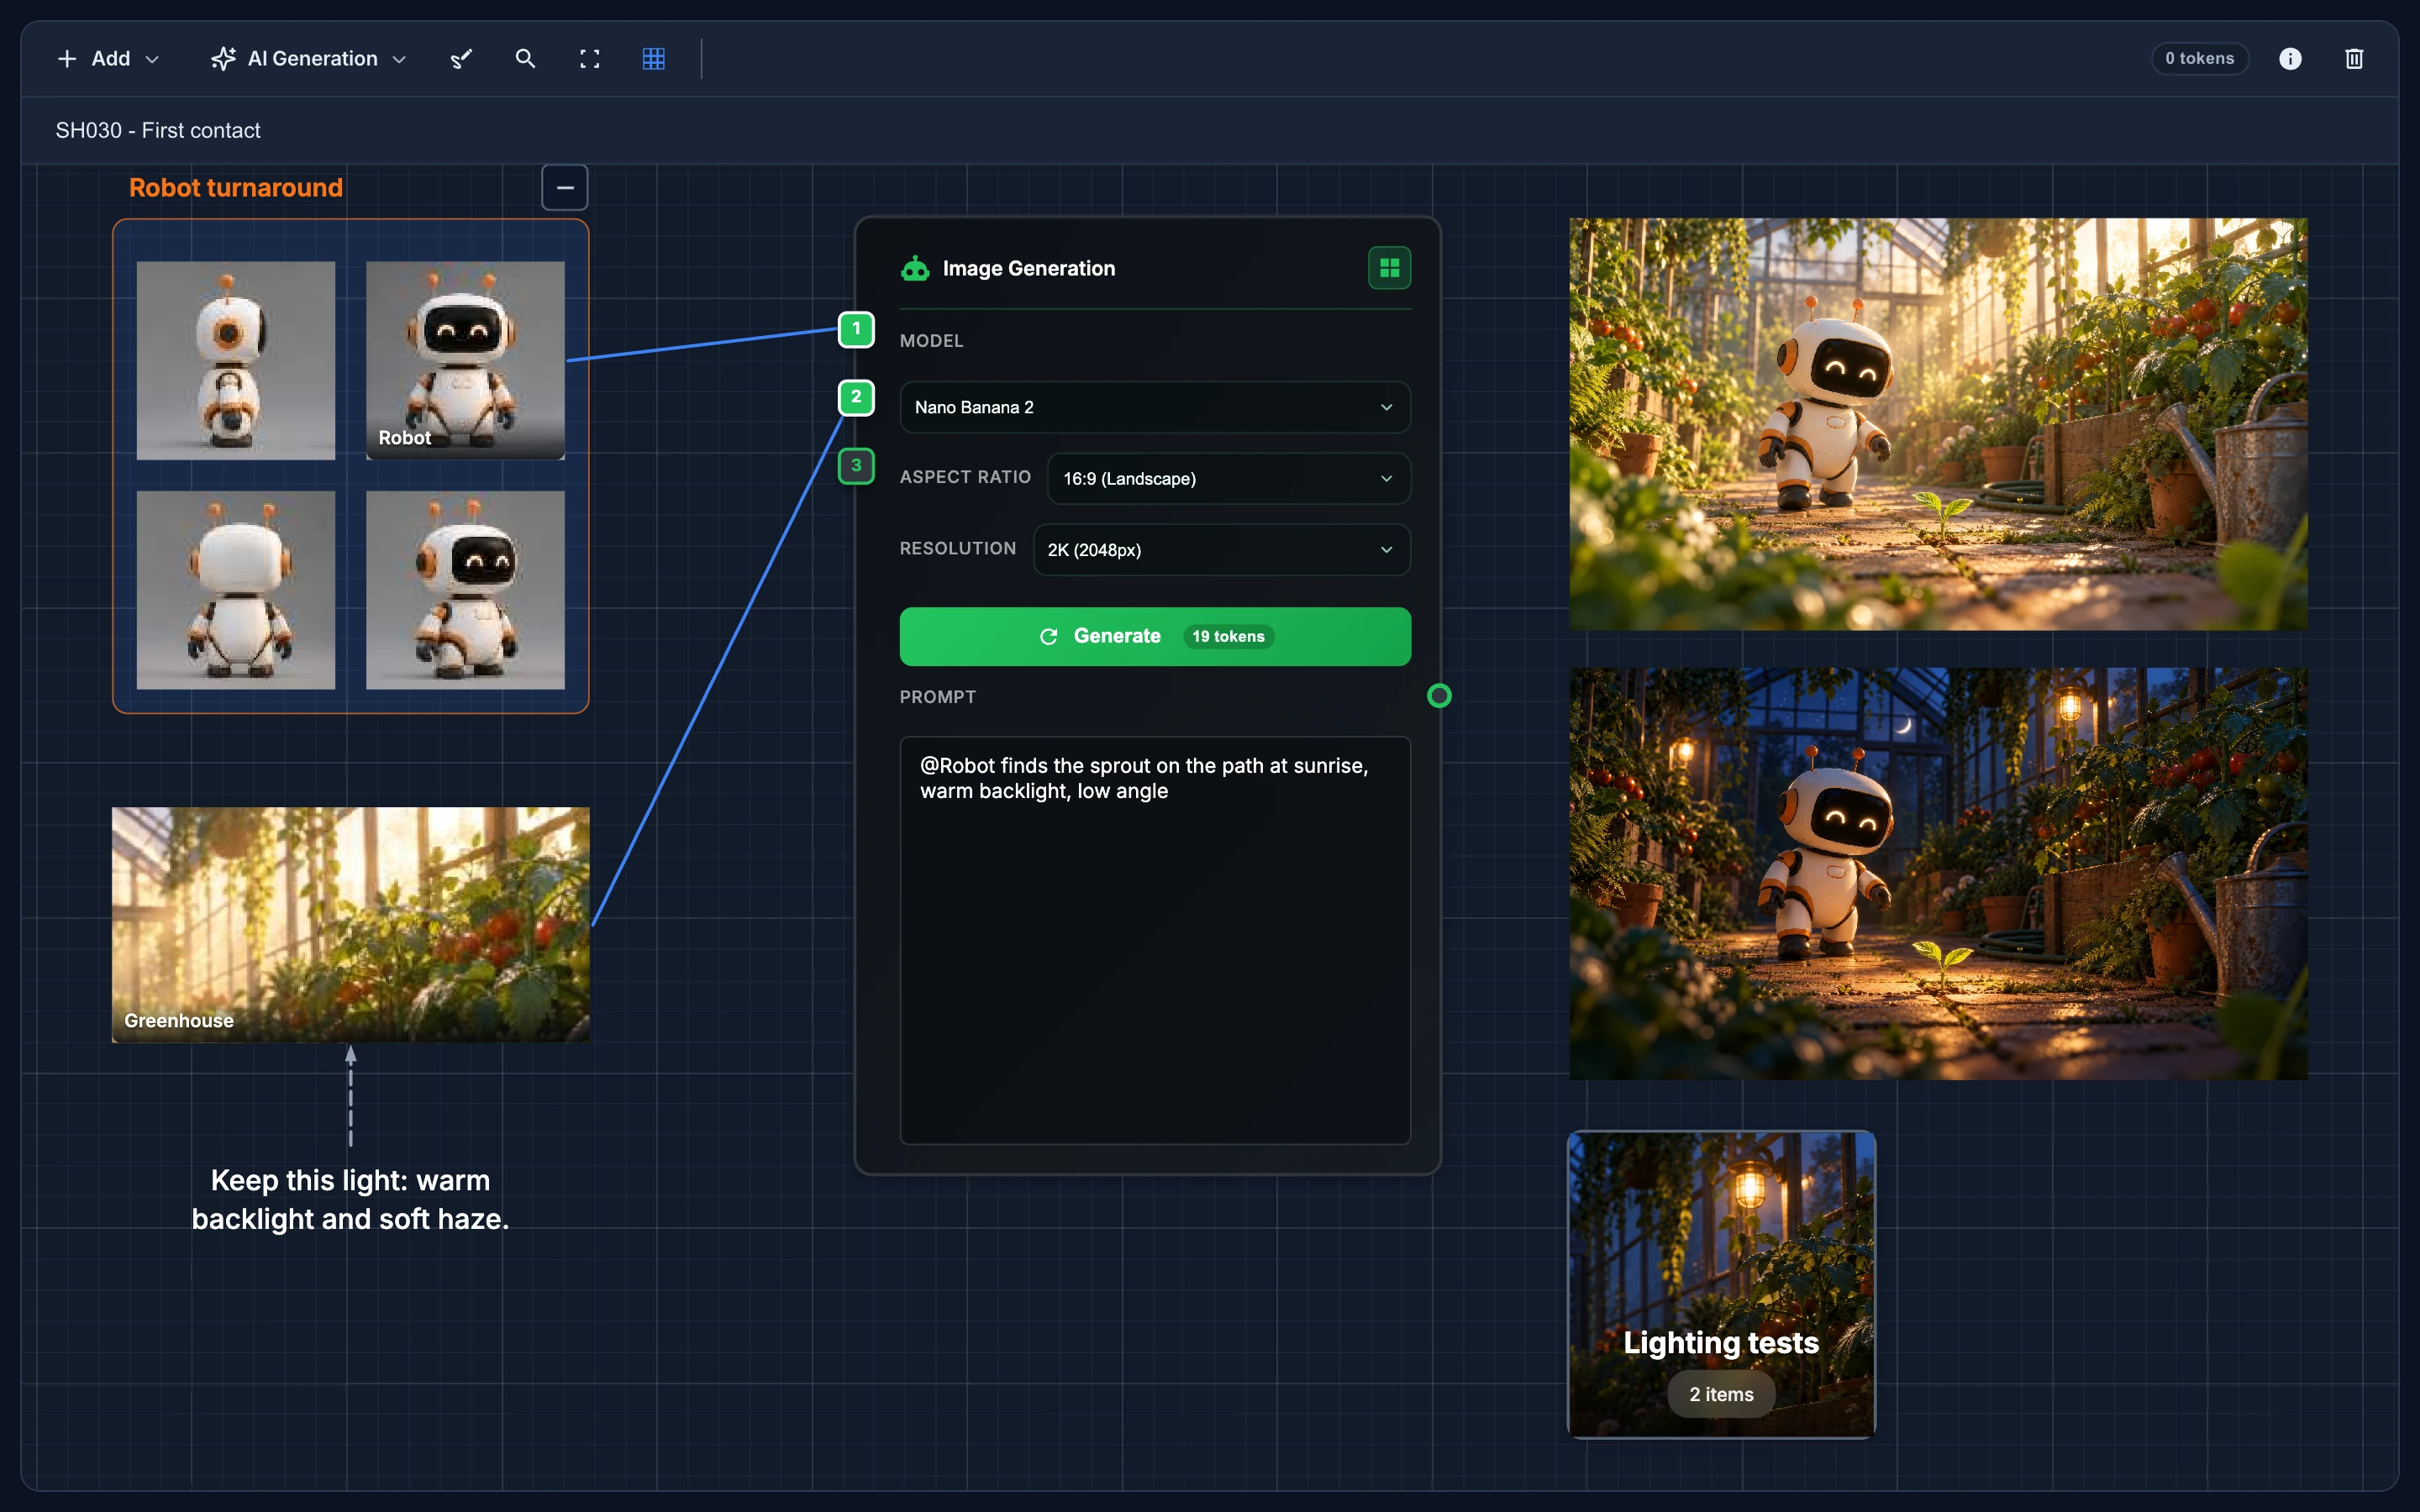
An Image Generation node turns a prompt and the references wired into it into new images, right on the canvas of the item. The results land next to the node as ordinary canvas images: move them, wire them into the next node, or publish them.
Add the node
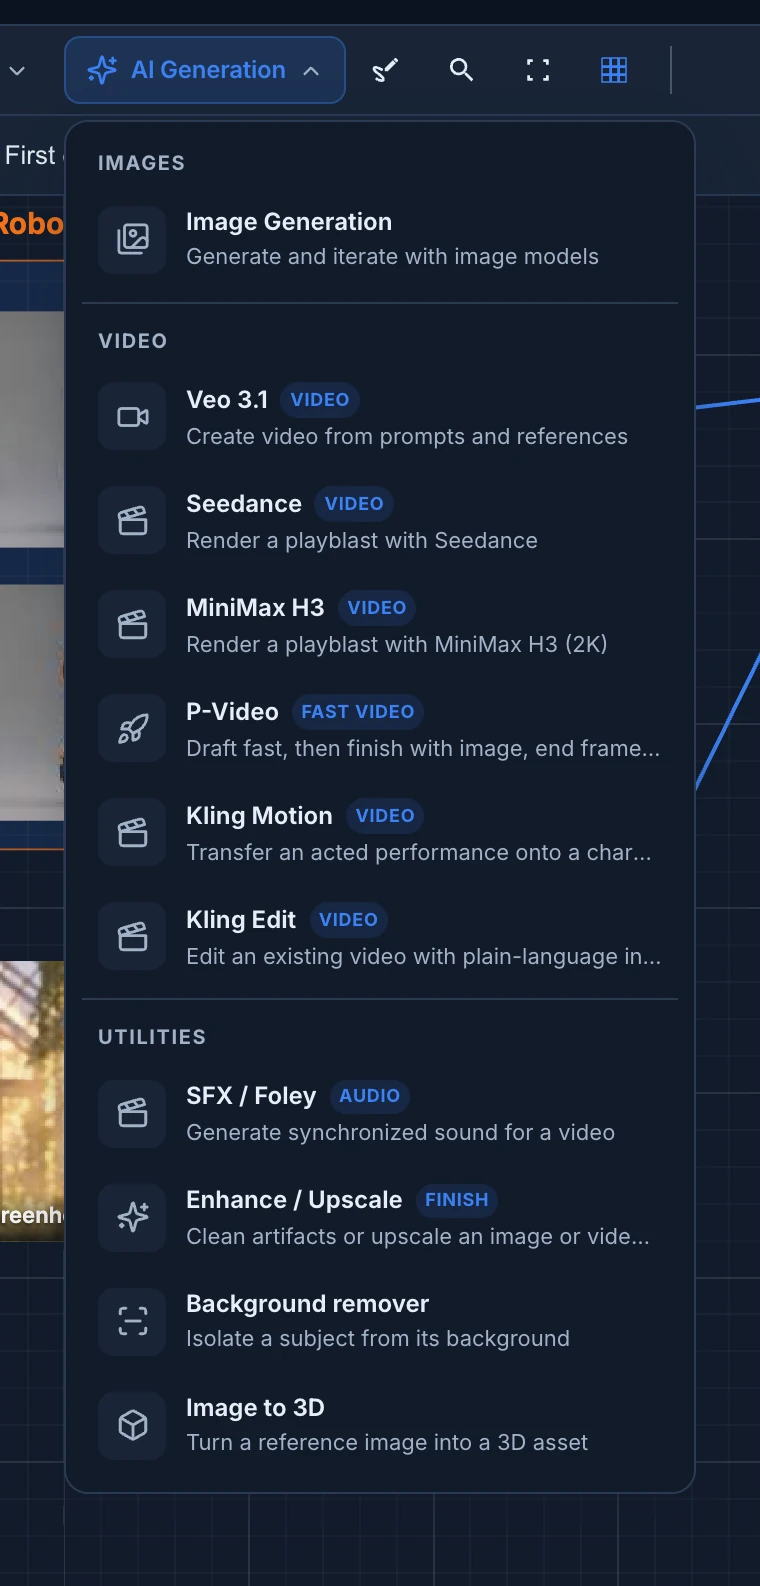
Open AI Generation in the toolbar and choose Image Generation, or right-click the board and find it under AI Generation › Images. Type in Type to create… to find it faster.
Wire the references
The numbered inputs on the left of the node take the references, in order: input 1 is "Image 1" for the model. There is always one free input more than the ones in use.
- Shift+drag from an input to an image, or select an image and Shift+click the input.
- An input takes an image, a video, a sketch or a checklist. A video gives the frame it is showing, so pause it where you want first.
- A frame or a folder gives its starred item. Hover an image inside and click the star in its corner (Use as this frame's output). Star another one and the node uses it from then on, without rewiring.
- An asset gives its whole set. See Reuse characters and sets as assets.
Hover an input to see how many images it carries. The output on the right of the node connects to its results.
Set it up
- Model: GPT Image 2.5 Sunburst (the default for a new node), GPT Image 2.5 Flare, GPT Image 2, Nano Banana Pro, Nano Banana 2, Seedream 5.0 Lite or Seedream 5.0 Pro. Changing the model resets its options. See Choose a model and see what it costs.
- Aspect Ratio: from 1:1 to 21:9. AUTO takes the usual ratio of the wired references, or 1:1 with none, and shows which one it picked, such as "AUTO (16:9)".
- Resolution: 1K, 2K or 4K.
- Prompt, at the bottom: describe the image, what must stay recognizable and the look you want. Click the arrow next to Prompt to expand a long one.
- Press Generate. Its pill shows what the image costs in tokens. It stays greyed out until there is a prompt.
The node makes one image per run. Press Generate again for another take: each run adds a result.
GPT Image options
With a GPT Image model, the node has more rows:
- Quality: Auto · model decides, Low · fast, Medium, High · detailed, and on the 2.5 models Extra high and Maximum. With Auto, the button shows · variable instead of a number: the model decides how much to spend.
- Resolution also offers Auto (model decides) and Custom dimensions, an exact size such as
1536x1024, in multiples of 16 and at most 3840 px a side. - Background: Auto, Opaque or Transparent (PNG or WebP).
- Format: PNG · lossless, JPEG · smaller, no transparency or WebP · small, keeps transparency, and Compression for JPEG and WebP.
A size or a combination the model can't make shows its reason under the button, and Generate waits until you fix it.
What the node adds to your prompt
With references wired, Animanager tells the model to keep them recognizable and treat the run as art direction on them, not a redesign. A sketch's description is added too. You only see your own words, in the node and in the result's details.
Guide it with a sketch
A Sketch (Add › Content › Sketch) is a napkin drawing that guides the composition: where the Robot stands, where the sprout is, which way the camera looks.
- Draw in the ratio you will generate. Pick a ratio at the top of the sketch.
- Use the named colors and say them in the prompt: "the red arrow is the camera move".
- Tools: draw, fill, straight line, select, move and eraser, in three widths.
- Sketch description, under the drawing, travels with the sketch into the prompt: "the Robot on the left, the sprout in the center".
- Wire an image into the sketch's own input to draw over it, with Base setting how visible it is.
Then wire the sketch's output into the generator, like any reference.
Results
As soon as you press Generate, a placeholder appears to the right of the node, saved and visible to everyone on the board. It shows where the run stands:
| Placeholder | What it means |
|---|---|
| Queued, "#2 in queue" | Waiting for a free slot in the studio's queue. |
| Provider queue | Waiting at the AI provider. |
| Generating 1/1… 40% | Running, with the time left when the provider tells it. |
| Saving result | Done, being stored. |
| Generation Failed | It failed, with the reason. Nothing is charged. |
The button at the top right of the node (Output layout) chooses how results are laid out: a grid, a row or a column. Results avoid what is already on the board, and a frame around the node grows to hold them.
The run belongs to the server: close the canvas and it carries on. When it finishes, a notification in the feed takes you back to the result. If the queue is full, the canvas says "Generation queue is full" and you try again a moment later.
The details of a result
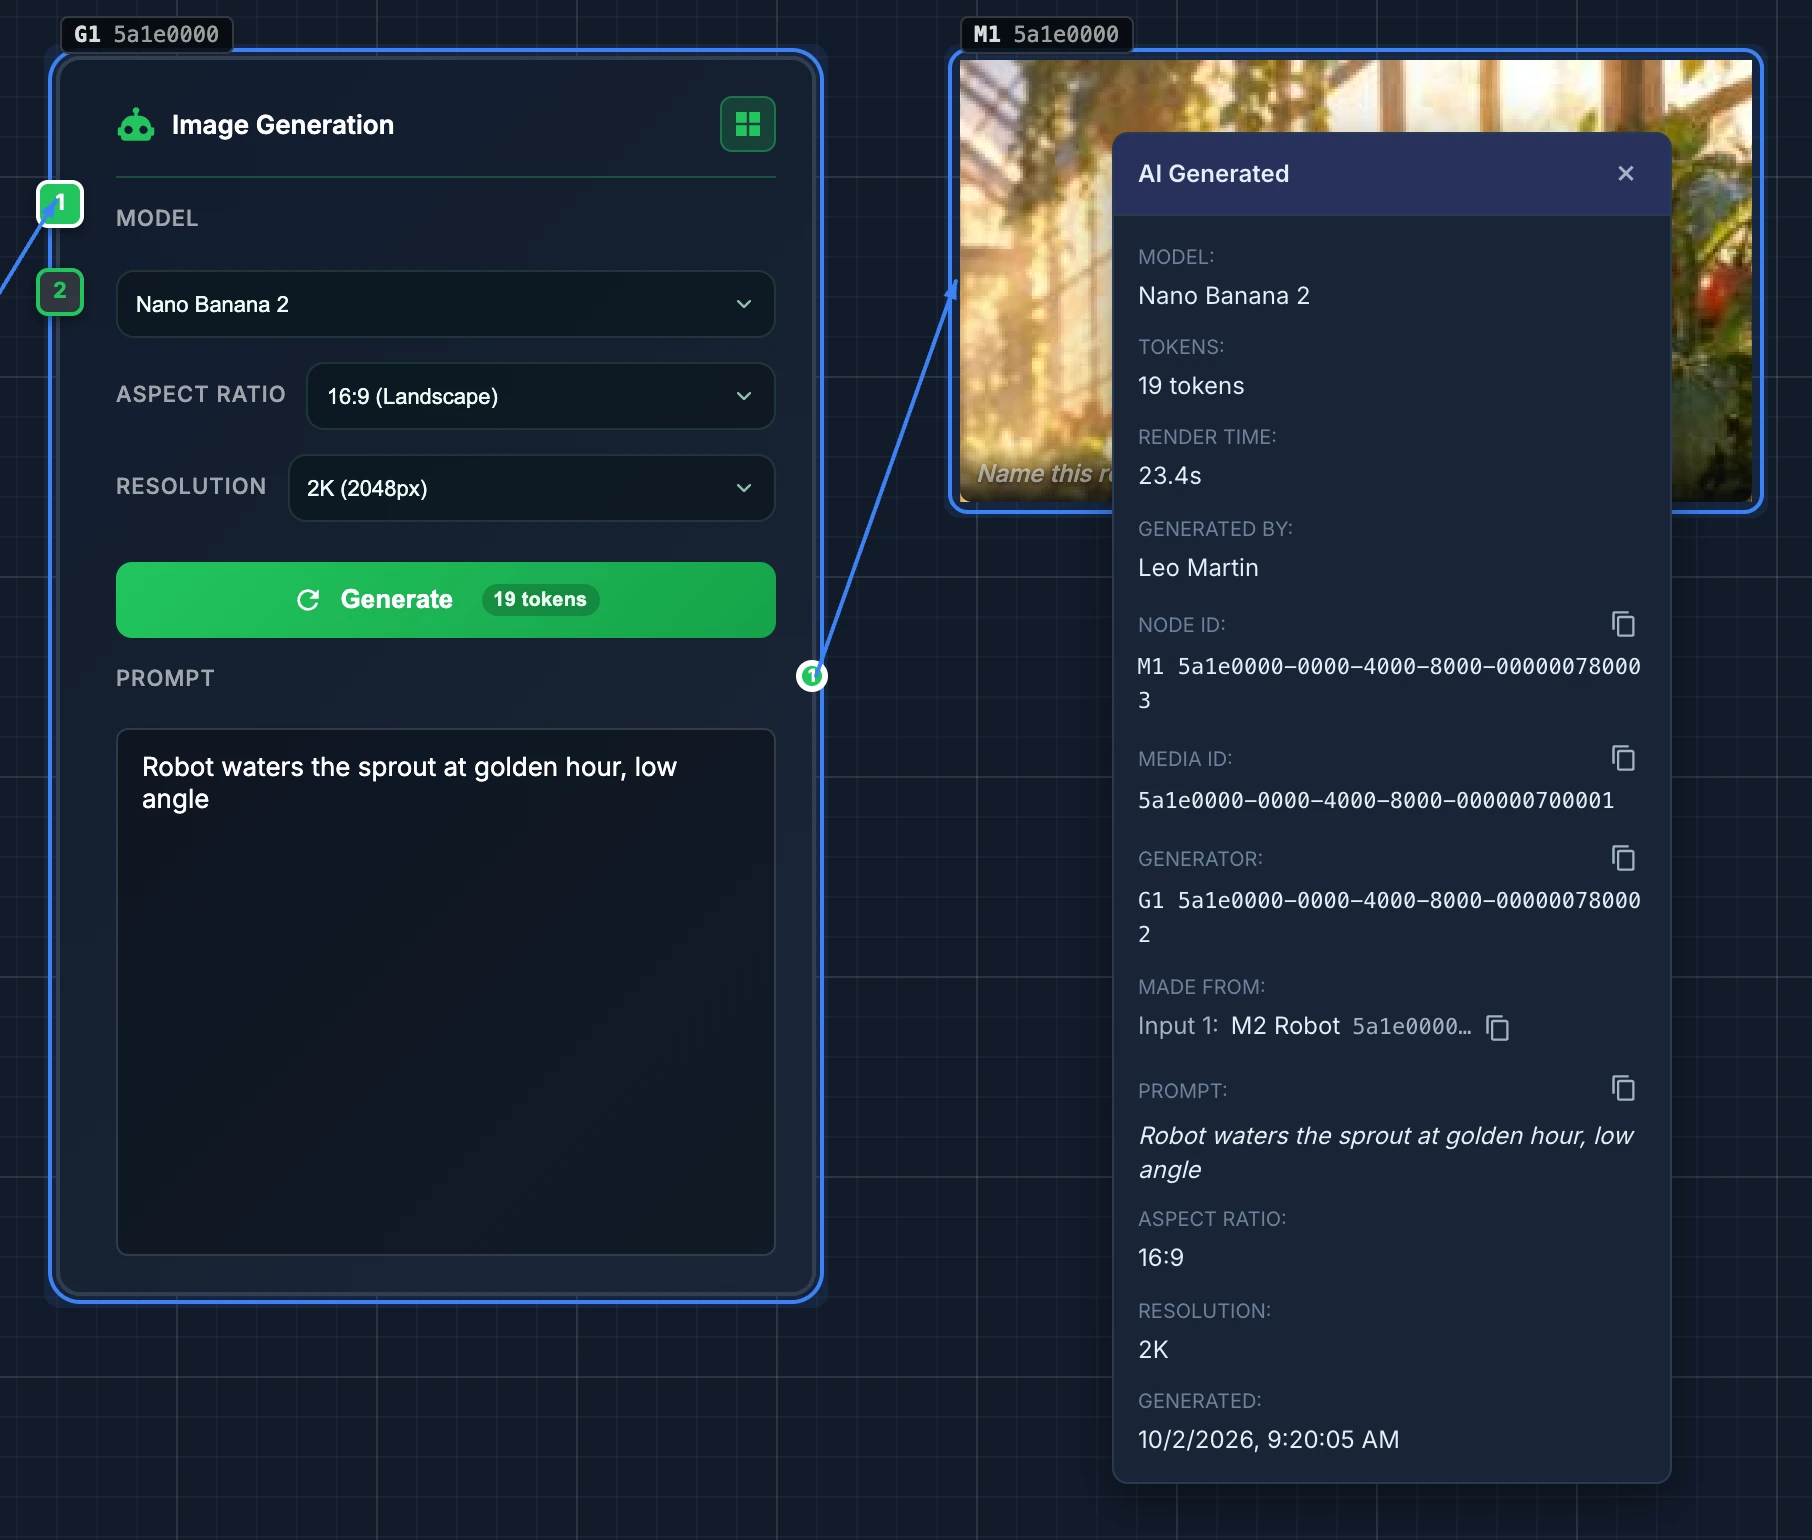
Hover a generated image and click the i (AI Generated - Click for details) for what made it: the Model, the Tokens it cost, the render time, the seed, who generated it, the settings used, Made from (each reference and its input), the Prompt with a copy button, and its Media ID. Every generation of the canvas is also listed in the Generations panel. See Find and reuse generations.
Storyboard Creator
Storyboard Creator, in the right-click menu under AI Generation, makes several frames in one run from a list of scenes, all on Nano Banana Pro.
- Write a Context / Style shared by every scene, such as "soft watercolor, warm greenhouse light".
- Add each scene with + Add and describe it. Untick a scene to skip it.
- Pick the Aspect Ratio and the Resolution, then Generate 4 Scenes.
The frames land in a column, in scene order.